This was our first week back from winter break.
I always have my students write about their goals for the new year. But, since we started so late into January this year I wanted to think of another new year project.
I love reading Martin’s Big Words and celebrating MLK’s message to “fight with words not fists.” I also loved the idea of my students picking one of their own words for the new year, so I coupled the two ideas.
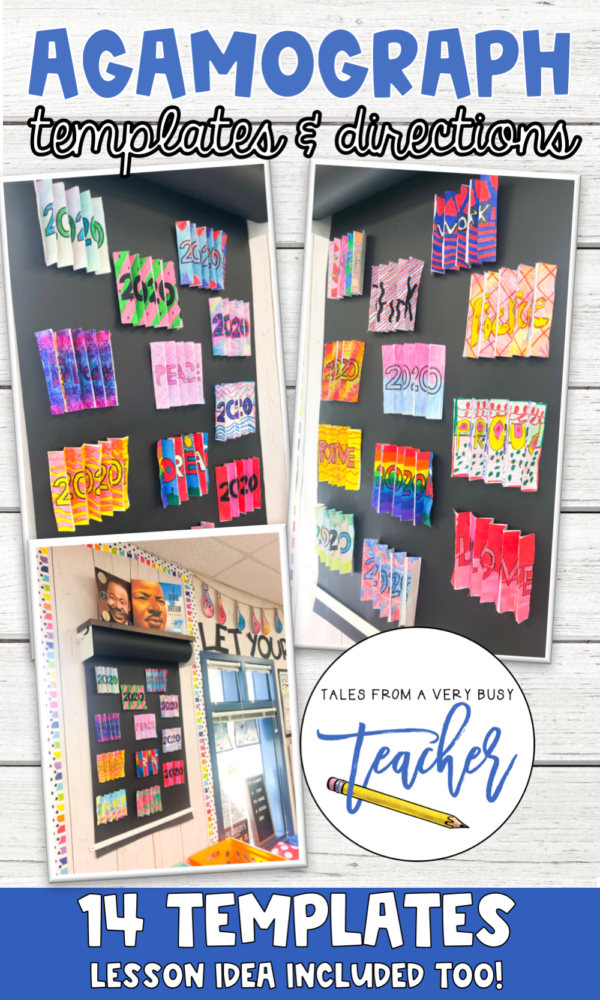
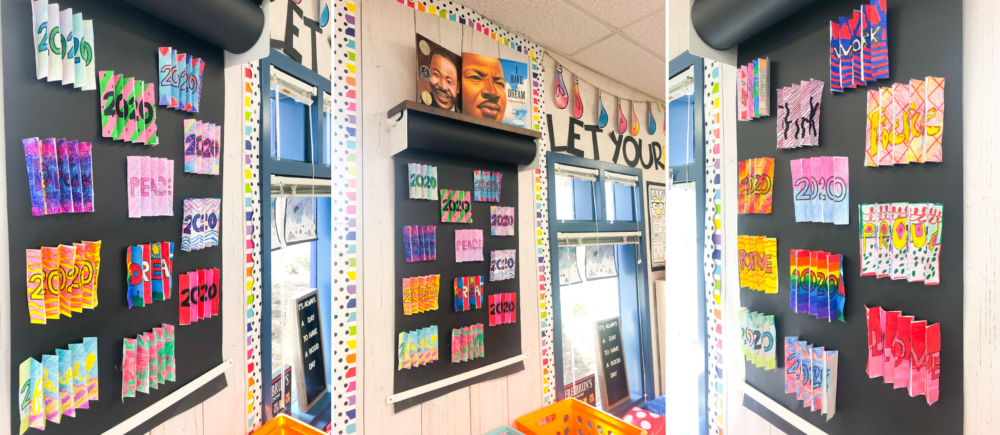
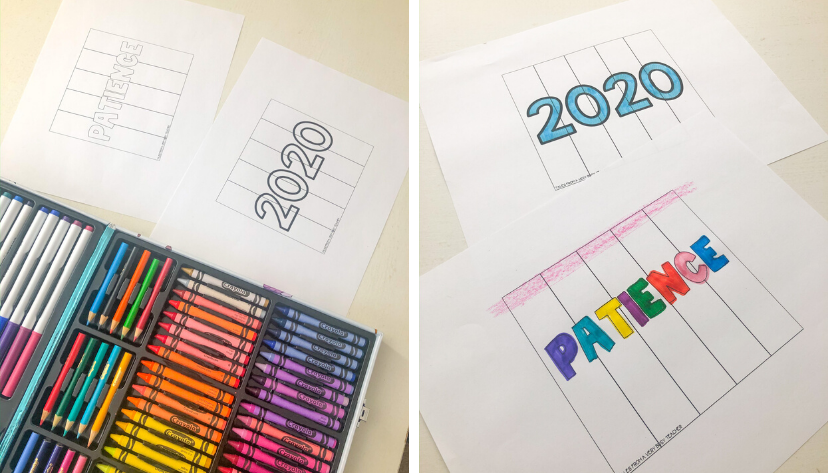
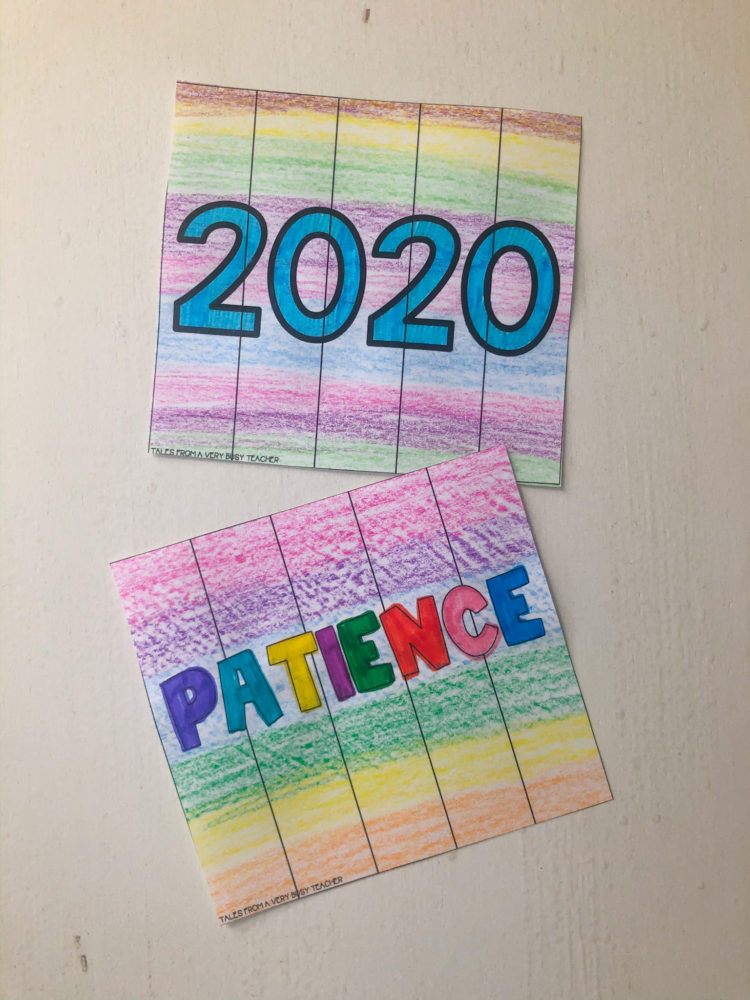
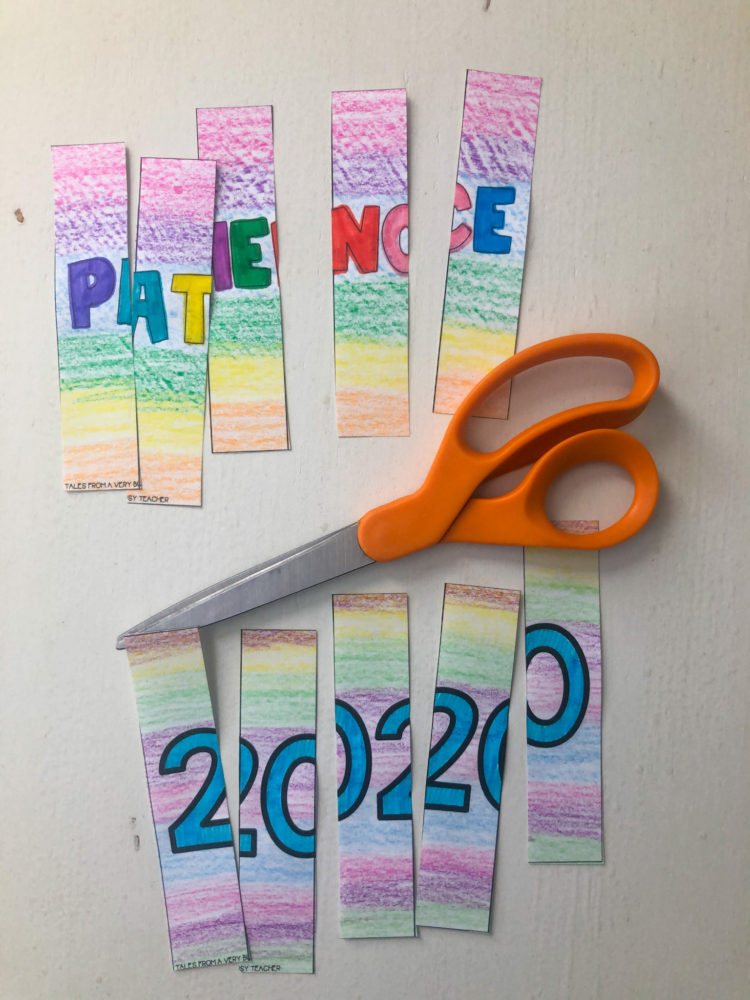
We read Martin’s Big Words and held a discussion about what BIG words mean. All of our ideas were collected on an anchor chart. I then asked my students to think of their own BIG word. They designed their word on a template I created, along with the year 2020 on another template.
We put those together to create an Agamograph. Find the templates in my shop.
My favorite part is how they displayed so beautifully on my @rettelco roller. I even used the pretty shelf to display my favorite MLK books.
It was such a fun project! My students wanted to make more to take home.
So now, here are the step by step directions on how you can make an Agamograph with your class.
1. Color the template or draw a picture on a blank template. For this specific project, students colored the 2020 and wrote a word on the blank template. Make sure to fill the whole paper so there is no white space. You can also just use two of the blank templates to create your own design.
2. Cut out each rectangle.
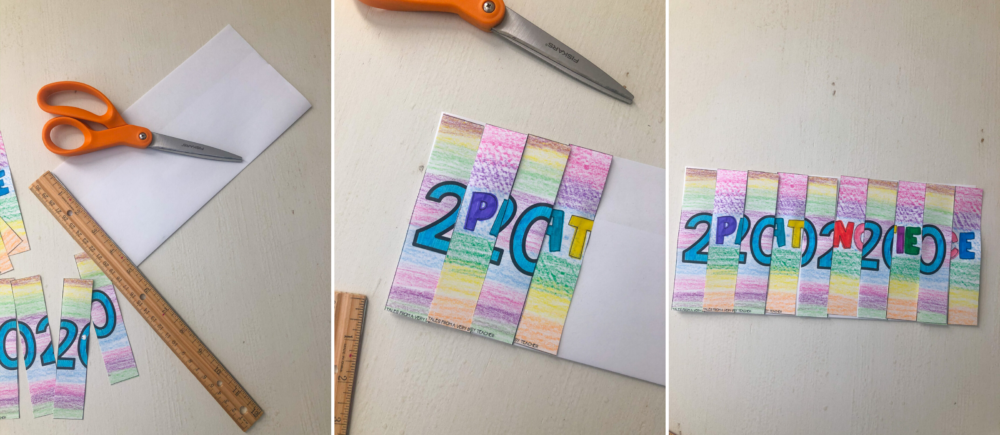
3. Turn the paper over and number each picture. By flipping it over, you’ll be numbering it in the correct order.
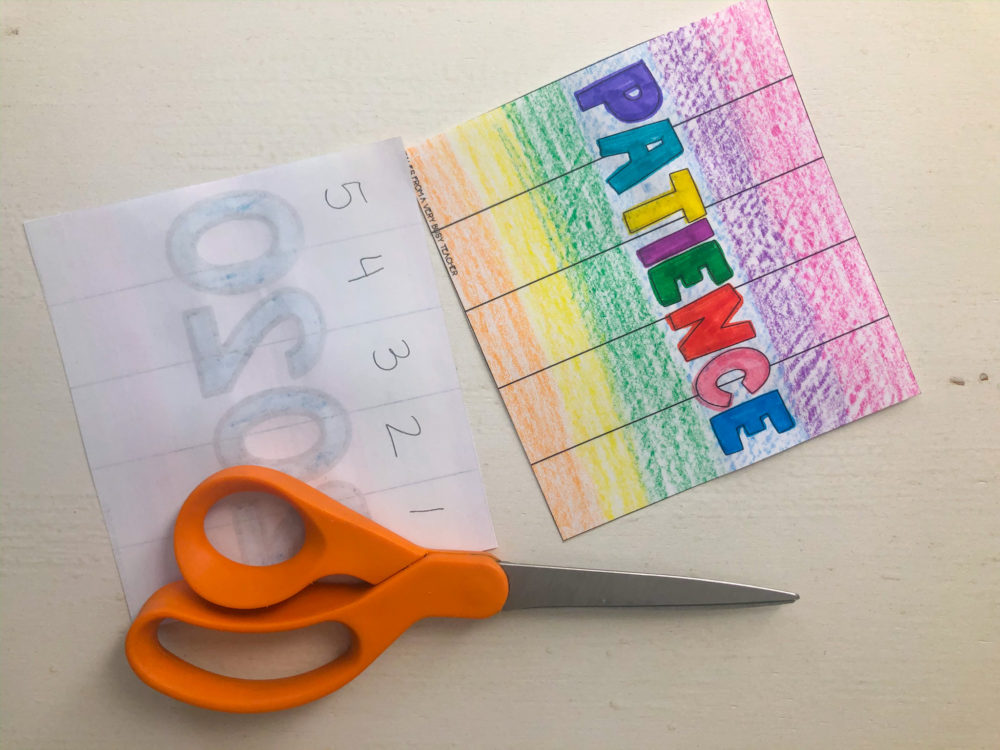
4. Cut each strip.
5. Glue the strips on a longer sheet of paper (it is 10.5 x 5 inches for this particular project) by alternating the papers. For example, it should go 1-1-2-2-3-3-4-4-5-5
6. Fold in an accordion style, front and back.
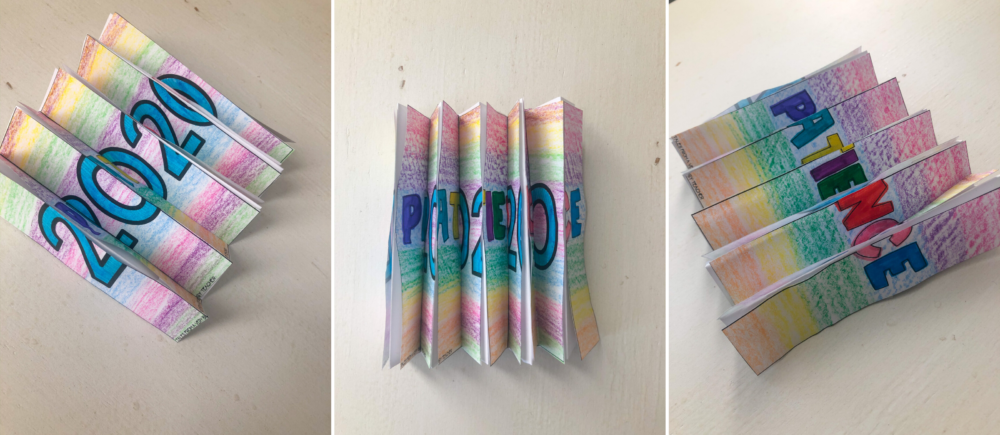
7. Hold up and see your artwork.
Find the lesson idea and templates in my shop. Click here!