


I didn’t get to go to Vegas this year, but I felt like I was there through all of the #periscoping! There were tons of takeaways that teachers shared, but one big takeaway that I am working on this week is revamping my store! I decided it needed some sprucing up and revitalizing.

I have been getting more confident with my editing in PPT skills and thought I would share with you how to spruce up your banner on TpT!
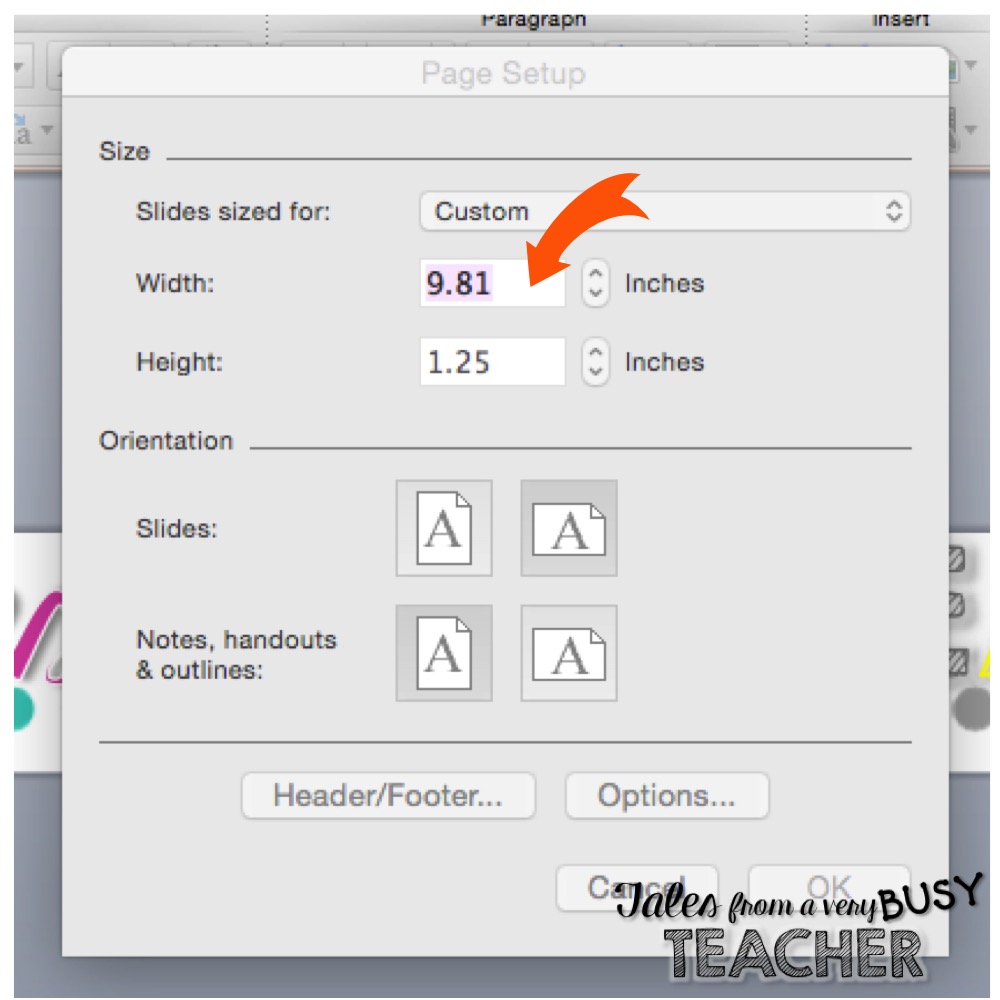
1. Open PPT and click FILE, then PAGE SETUP.
Set up your page to these dimensions:
Width: 9.81 in
Height: 1.25 in
Click here for the template you can download for your computer.
This is what your banner will look like:
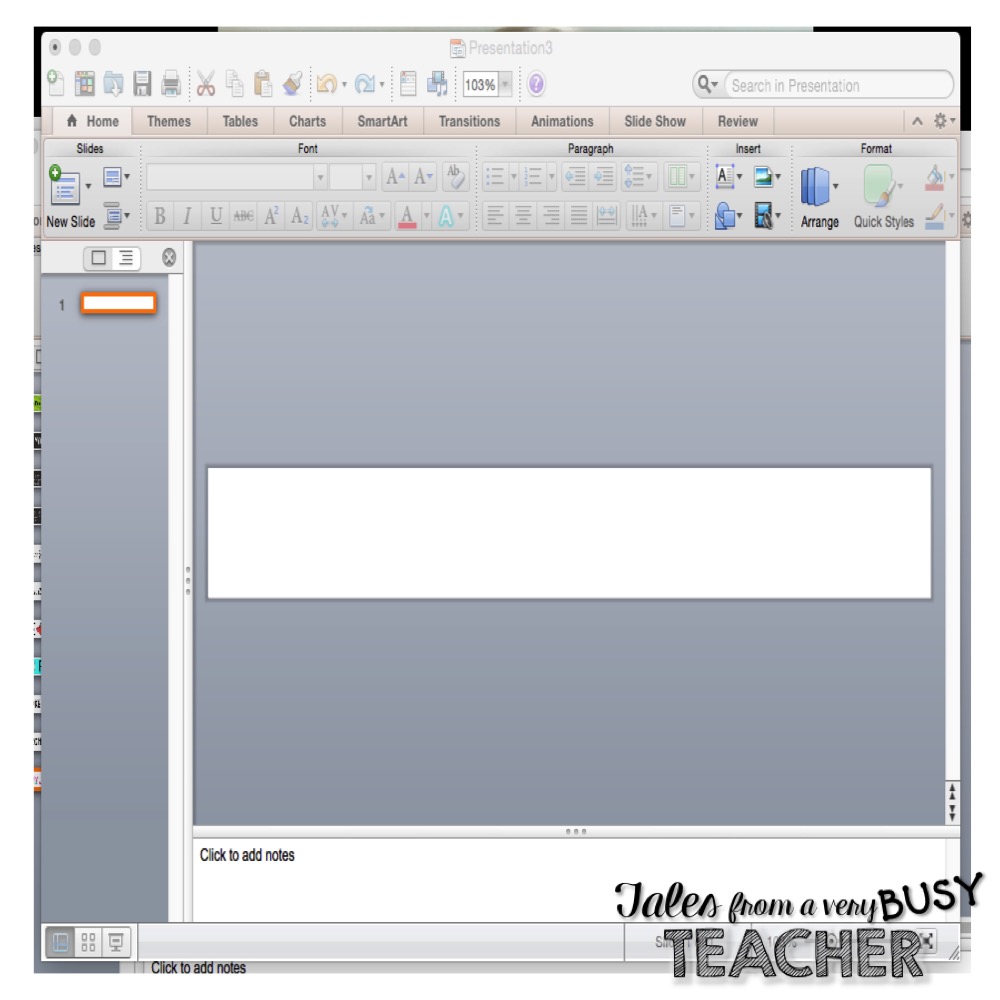
2. Use the text boxes to create your wording. Add graphics, play around with the shadowing and glow styles, and be creative.

3. Once you’re done creating, use your cursor to highlight all of your boxes. When you’re highlighting everything, make sure to notice if the text boxes go above the white space. If your text boxes go off the white space, your picture will be too big. Make sure all of the boxes fit within the white space. If it doesn’t, use the line spacing options to make the text boxes more compact.

After highlighting, right click the boxes (making sure that all the boxes are still highlighted) and click “save as picture.”
4. Title your image in the box and be sure to use the PNG format. PNG will make the background transparent.

Now you’re ready for uploading to your store!
1. Click your “dashboard.”
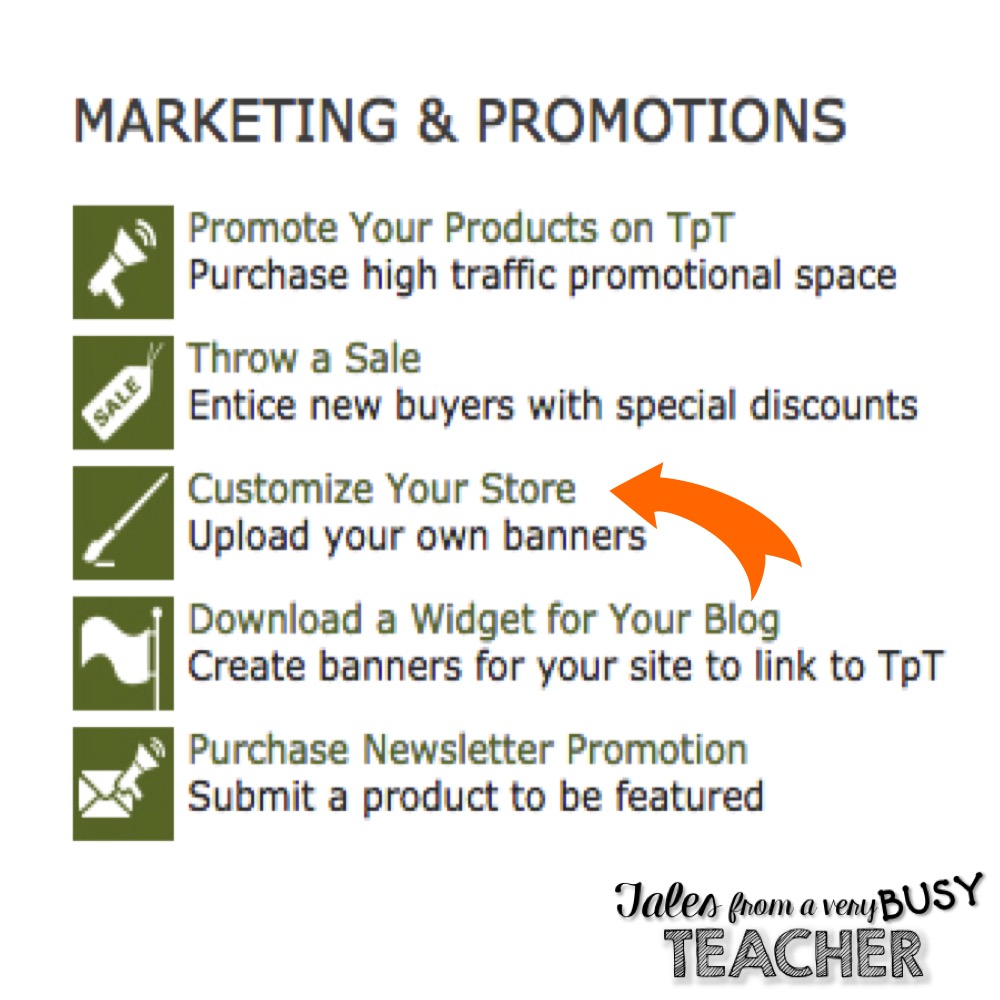
2. Click “customize your store.”

3. Upload your image and enter a link to connect your image. Pick a link to one of your products or one of your customizable categories.

Now your store is spruced up! If you’re having problems, shoot me an email and I’ll be happy to help you out!
To take it one step further, I am thinking about #periscoping this tutorial. Follow my Twitter or Instagram to find out when I’ll #periscope! @mrsfreibrun
Now, go spruce up your store!